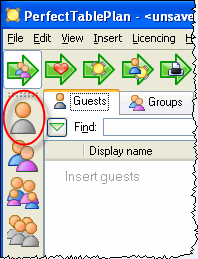
The first step to creating your table plan is to add information about your guests.
Click on the ![]() Insert
single guest button in the Insert
tool bar (on the left of the Main
window).
Insert
single guest button in the Insert
tool bar (on the left of the Main
window).
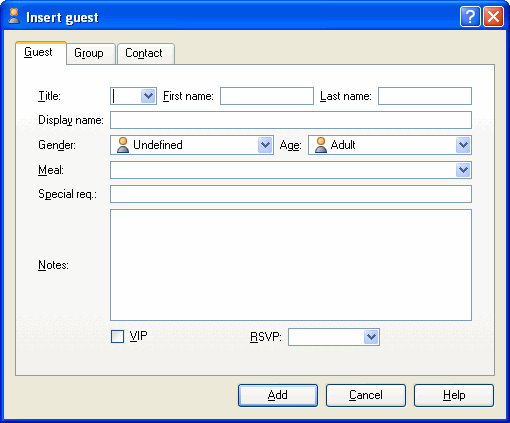
The Insert guest window will appear.
Select Mr from the Title drop-down list. Note that the Gender has now been set to Male.
Type john in the First name field. Note that it is automatically capitalised to John. Press the keyboard Tab key to move to the next field.
Type smith in the Last name field. Press the Tab key. Note the Display name has been set to Mr John Smith.
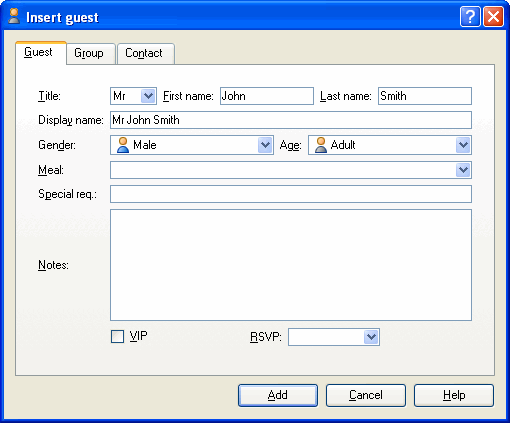
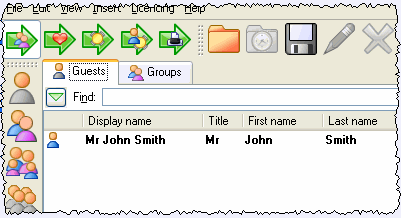
Click the Add button. The guest will be added to the Guests pane.
Click on the ![]() Insert
guest couple button
in the left (Insert) tool bar. The Insert
couple window will appear. Fill in the details of the first
guest of the couple, as below:
Insert
guest couple button
in the left (Insert) tool bar. The Insert
couple window will appear. Fill in the details of the first
guest of the couple, as below:
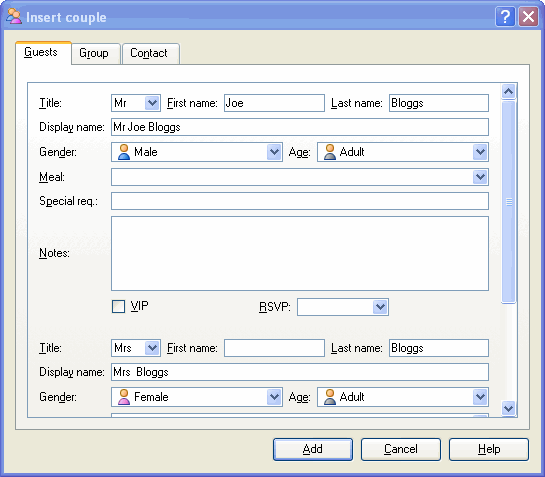
Click on the VIP check box to show that this is a particularly important guest.
Now move the scroll bar down and complete the details of the second guest of the couple, as below:

Click the Add button.
Click on the ![]() Set
proximity button in the Task
tool bar. Notice that a
Set
proximity button in the Task
tool bar. Notice that a ![]() is displayed in the Proximity pane.
is displayed in the Proximity pane.
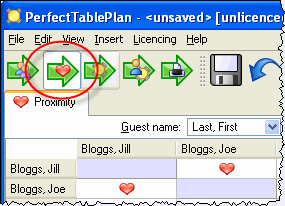
This means that Joe Bloggs and Jill Bloggs should be placed on a table next to each other.
Click on the ![]() Add
guests button in the Task
tool bar.
Add
guests button in the Task
tool bar.
Click on the ![]() Insert
guest family button
in the left (Insert) tool bar. The Insert
family window will appear. Add the following guests:
Insert
guest family button
in the left (Insert) tool bar. The Insert
family window will appear. Add the following guests:
|
Title |
First name |
Last name |
Gender |
Age |
|
Mr |
William |
Jones |
Male |
Adult |
|
Mrs |
Nicola |
Jones |
Female |
Adult |
|
Master |
Jason |
Jones |
Male |
Child |
|
Miss |
Natasha |
Jones |
Female |
Child |
Click the Add button.
Click on the ![]() Set
proximity button in the Task
tool bar. Notice that a
Set
proximity button in the Task
tool bar. Notice that a ![]() is displayed in the Proximity
pane for Mr and Mrs Jones. A
is displayed in the Proximity
pane for Mr and Mrs Jones. A ![]() is displayed for all the other family members. This means that Mr and
Mrs Jones should be placed on a table next to each other, and the
rest of the family members near to each other. Click on the
is displayed for all the other family members. This means that Mr and
Mrs Jones should be placed on a table next to each other, and the
rest of the family members near to each other. Click on the ![]() Add
guests button in the Task
tool bar.
Add
guests button in the Task
tool bar.
Select File|![]() Save
or the equivalent Main tool bar
button to save the plan. The Save as
window will appear. Enter a sensible name, such as tutorial.tp,
and click Save.
Save
or the equivalent Main tool bar
button to save the plan. The Save as
window will appear. Enter a sensible name, such as tutorial.tp,
and click Save.
Look at the Guests pane.
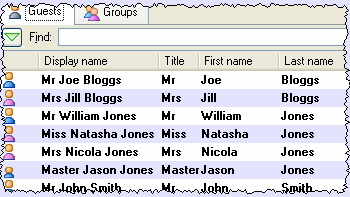
Notice that you can determine age and gender from the guest icon. The guests are shown in bold to show they haven't yet been assigned to seats.
Click on Display name, Title and other column headers to sort the guests.
Click on the ![]() Groups tab.
Groups tab.

Notice that the guests have been grouped as a couple, a family and a single person.
In either the Guests or Groups pane click on the row with Mr Smith and then click the Mr in the Title column. Change the title to Dr and press the Enter key.
![]()
Note the Display name
is also updated (unless you have previously edited it). You
can also view/edit this guest by double clicking on his ![]() icon to display the Guest properties window.
icon to display the Guest properties window.
You can set guest's choice of meal and whether they have accepted their invitation in this pane.
Note You can also add guests by importing them from other applications such as Excel, Outlook and Outlook Express. This can save you a lot of typing.
Next: 3. Set proximity >>