The ![]() Dimensions window allows you to change the dimensions of the floor plan. To display this window click the
Dimensions window allows you to change the dimensions of the floor plan. To display this window click the ![]() button at the top of the
button at the top of the ![]() Floor Plan pane.
Floor Plan pane.
Units allows you to choose metres or feet, as you prefer.
Size is the size of the floor plan metres/feet across (X) and down (Y).
Area is across x down, in m2 or ft2 (depending on your choice of units).
Area per guest is the amount of area per guest, in m2 or ft2 (depending on your choice of units).
Area per accepted guest is the amount of area per guest who has ![]() accepted, in m2 or ft2 (depending on your choice of units). As a rough guideline:
accepted, in m2 or ft2 (depending on your choice of units). As a rough guideline:
seating type |
comfortable space per guest |
minimum space per guest |
||
ft2 |
m2 |
ft2 |
m2 |
|
all standing |
7 |
0.7 |
5 |
0.5 |
all seated, rectangular tables |
11 |
1 |
8 |
0.7 |
all seated, circular tables |
14 |
1.3 |
11 |
1 |
Note Local fire regulations may specify limits on the number of guests for a venue.
Seat width is the number of metres/feet between the centre of one seat and the next (including elbow room). Automatic table size is calculated from seat width, so increasing/decreasing seat size may increase/decrease table sizes.
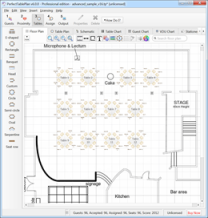
Check Draw grid if you would like a visible grid to be drawn in the ![]() Floor Plan pane. If checked you can set the drawn grid Size in the chosen units. Every fifth line is shown darker to make it easier to count grid squares.
Floor Plan pane. If checked you can set the drawn grid Size in the chosen units. Every fifth line is shown darker to make it easier to count grid squares.
Check include in print/copy/export if you would like to include grid lines when you print, export or copy to the clipboard.
Note Printing/exporting a fine grid (e.g. each foot) in a large room can slow down print/export times considerably.
Check Snap to grid if you would like the centres of items in the ![]() Floor Plan pane to be constrained to a grid. If checked you can set the snap to grid Size in the chosen units. If you turn Snap to grid on or change the snap grid Size, you will be given the option to snap all tables, shapes and text to the new grid.
Floor Plan pane to be constrained to a grid. If checked you can set the snap to grid Size in the chosen units. If you turn Snap to grid on or change the snap grid Size, you will be given the option to snap all tables, shapes and text to the new grid.
Note The drawn grid and the snap grid are independent of each other.
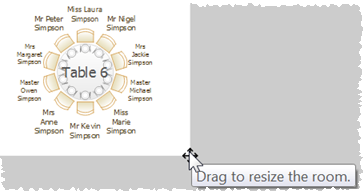
You can also re-size the floor plan by dragging the bottom right corner.
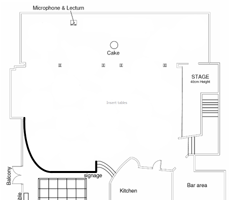
You can add a background image to the
Click on Browse... to locate the image file you want to use as your background. PNG, JPEG and BMP image file formats are supported. Click on Delete to delete the background image. Change Background image size to change the size of the background image as it appears in the Floor Plan pane. It will be in the units set in the Units field. Uncheck constrain proportions if you want to stretch the floor plan image vertically or horizontally (you won't need to do this if it is to scale). The easiest way to scale the background image correctly is using the background image scaling feature. Use background image scaling to correctly scale the image. The image data is stored inside your plan file, so you can move the plan file to another computer without losing your image. Note A very large image may cause your plan to be slow to load, draw and save. You can use a graphics package such as MSPaint or Adobe Photoshop to resize your image smaller. Images larger than 0.25 Mega pixels will be compressed in JPEG format for faster loading and saving. This will remove any transparency in the image and may also reduce the image quality. |
Click OK to accept the changes. Click Cancel to discard the changes. Any changes you make to dimensions only apply to the current plan.
See also: