We have added a lot of features to PerfectTablePlan, with the aim of making your life easier. However, quite a few of them are hidden away to prevent the user interface from becoming too overwhelming for novice users. Below is a list of useful things you might not know about PerfectTablePlan. Taking 10 minutes to read through them could save you a lot of time, especially if you are a frequent user.
All editions
Drag a group
If you hold down the ![]() key while dragging a guest, it will drag all members of that group.
key while dragging a guest, it will drag all members of that group.
Toggle fullstops in titles
If you press Cmd+. PerfectTablePlan will toggle a fullstop on the titles of all guests. E.g. it will convert "Mr" to "Mr." and "Mr." to "Mr".
Textures and gradients
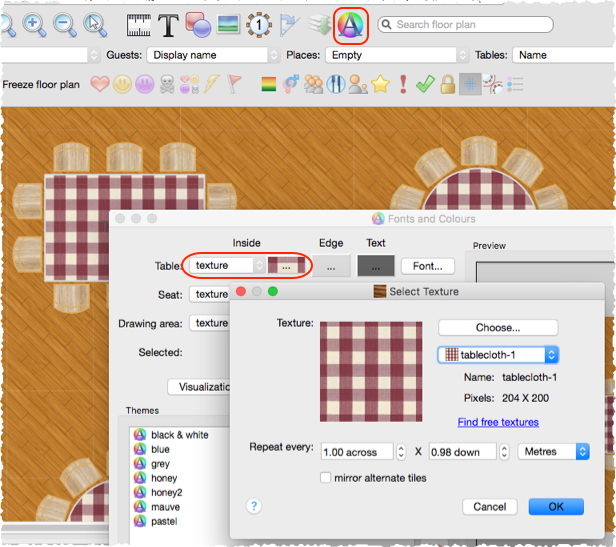
You can use textures and gradients for tables and shapes to liven up your floor plan. We ship a number of textures with PerfectTablePlan, including grass, tiles, marble and wood.
Multiple meal courses
PerfectTablePlan can handle multiple meal courses. Just separate them by commas in the Meal field. They will be totalled separately in the Summary report in the ![]() Report pane.
Report pane.
![]()
Keyboard accelerators
You will be much faster at using PerfectTablePlan if you memorize some of the keyboard accelerators.
Accelerator |
Result |
|
Select all non-hidden items |
|
Insert single guest |
|
Lock selected guests |
|
Unlock selected guests |
|
Open a plan |
|
Save the plan |
|
Unassign the selected guest(s) |
|
Undo |
|
Zoom in/zoom out |
|
Select previous/next table |
|
Select previous/next guest |
There is a full list of accelerators here.
Edit multiple guests
To change a property for multiple guests, select the guests then select Edit>Guest Property from the main menu, then select the appropriate sub-menu.
Auto seat assignment
You can select File>Auto Assign Seats as often as you like. Each time it will start with the current seat assignments and try to improve them. The more you run it, the better the result is likely to be. Change the settings in the Auto assign tab of the ![]() Preferences window if you want it to run for more or less time.
Preferences window if you want it to run for more or less time.
Check guest happiness
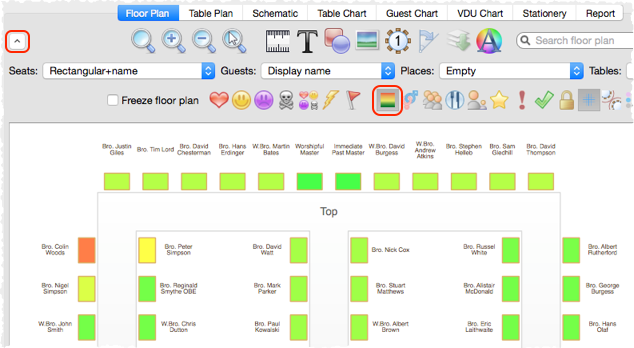
You can colour code guests in the ![]() Floor plan and
Floor plan and ![]() Table plan panes by how happy they are with where they are seated, based on their proximity settings. Green=happy, Red=unhappy. This is a quick way to spot any potential issue you need to address.
Table plan panes by how happy they are with where they are seated, based on their proximity settings. Green=happy, Red=unhappy. This is a quick way to spot any potential issue you need to address.
Dragging in the Floor Plan pane
If you left click and drag you will drag out a selection rectangle. Everything inside or touching the rectangle will be selected when you release.
If you right click and drag, you can scroll the floor plan horizontally and vertically.
If you are zoomed in and drag a guest near to the edge of the floor plan, the pane will scroll automatically.
You can add an image by dragging it straight onto the floor plan.
Align tables
Aligning tables and other items in the floor plan is much easier if you turn on grid snap.
You can also select items and move them using the arrow keys. If grid snap is on it will move them one grid spacing. If grid snap is not on, the item will be moved 5 cm/2 inches (1 cm/0.4 inch if the ![]() key is held down).
key is held down).
Sweetheart/cabaret tables
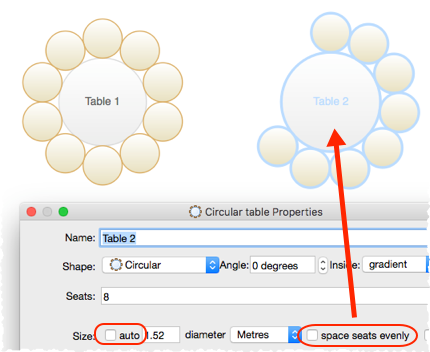
You can arrange seats around a circular table in a sweetheart/cabaret style arrangement.
Freeze the floor plan
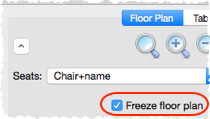
If you want to avoid accidentally moving tables after you have set-up your floor plan, you can freeze the floor plan.
Quick add guests
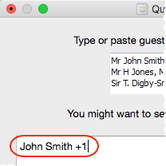
If you have a list of guest names, you can select Insert>Quick Add Guests... and paste the names straight in.
Change columns during import
If you click the More button in the ![]() Import Data window you can add, delete, split and join columns in the imported data.
Import Data window you can add, delete, split and join columns in the imported data.
Troubleshooting
The Troubleshooting report in the ![]() Report pane gives you a quick overview of any potential issues in a textual form, e.g.:
Report pane gives you a quick overview of any potential issues in a textual form, e.g.:
•'Next to' guest pairs not seated near to each other
•Guests without titles
•RSVP accepted guests not assigned to seats
•Guests with no meal assigned
•Tables with empty seats
Export to web
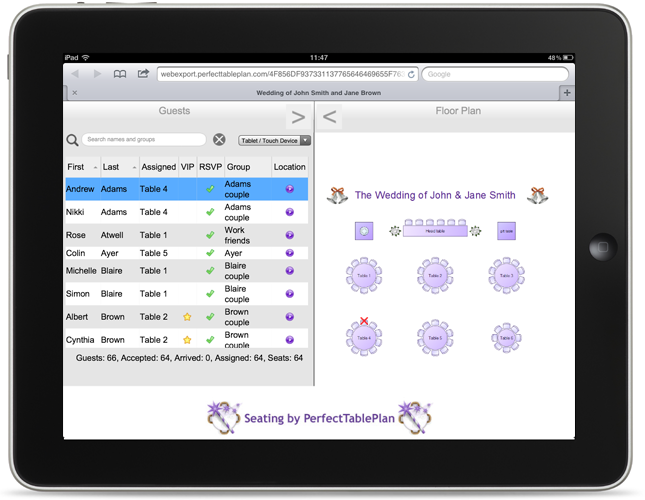
Using File>Export... you can export a web version of your plan that can be accessed by anyone with a web enabled device (e.g. a tablet). This can be very useful for sharing a plan with a client or to allow staff to show guests to seats at the event.
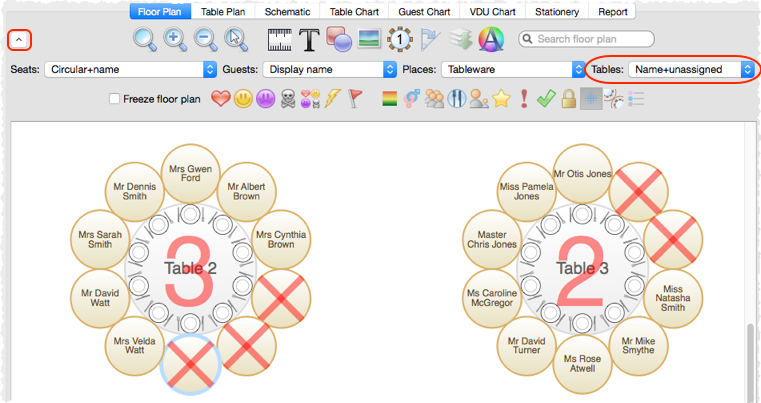
Show unassigned seats
You can highlight unassigned seats using the Tables drop-down list in the ![]() Floor plan pane.
Floor plan pane.
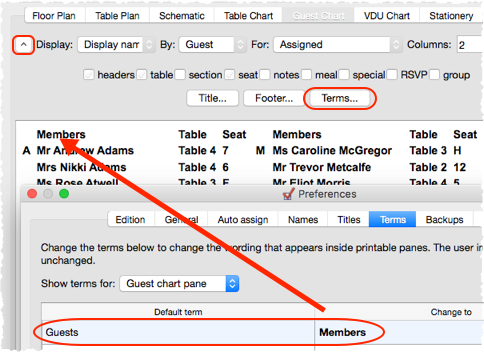
Change headings in charts and reports
You can change words in printouts (e.g. to a different language) using the Terms button.
Use an electronic seating chart
Guests have a bad habit of changing their minds as soon as you have printed your guest chart. You can avoid this by displaying your plan on a large VDU or Plasma screen. You can even update it in real time.
Gesture support
If your device supports gestures, you can 'pinch' to zoom in the ![]() Floor Plan and
Floor Plan and ![]() Table Plan panes.
Table Plan panes.
Backup files
PerfectTablePlan automatically creates backup files for you. You can control how often these files are created in the Backups tab of the ![]() Preferences window. You can list backup files by selecting File>Backups....
Preferences window. You can list backup files by selecting File>Backups....
Note that this won't save you from a harddisk crash. So always backup your plans to another device. You can even email them to yourself or a colleague.
How do I? help
At the end of the main menu there is a How do I? button. Click on this to get context sensitive help.

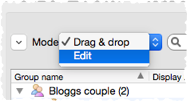
Edit mode
You can easily edit individual guests in the ![]() Guests or
Guests or ![]() Groups pane using Edit mode. Remember to switch back to Drag and drop mode to drag and drop guests to seats.
Groups pane using Edit mode. Remember to switch back to Drag and drop mode to drag and drop guests to seats.
Drag and drop files
You can drag a plan file onto the ![]() Guests,
Guests, ![]() Groups or
Groups or ![]() Floor plan pane to open it. Similarly you can drag an Excel or CSV file on to PerfectTablePlan to import it.
Floor plan pane to open it. Similarly you can drag an Excel or CSV file on to PerfectTablePlan to import it.
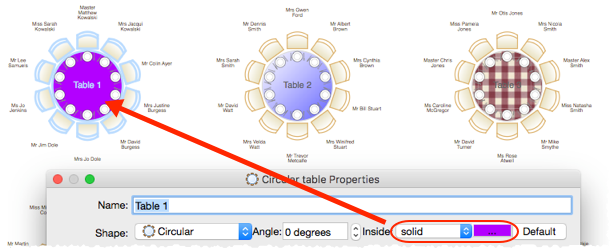
Colour tables
You can colour tables individually in the ![]() Floor plan and
Floor plan and ![]() Table plan panes via the Table Properties window.
Table plan panes via the Table Properties window.
Coloured dots on stationery
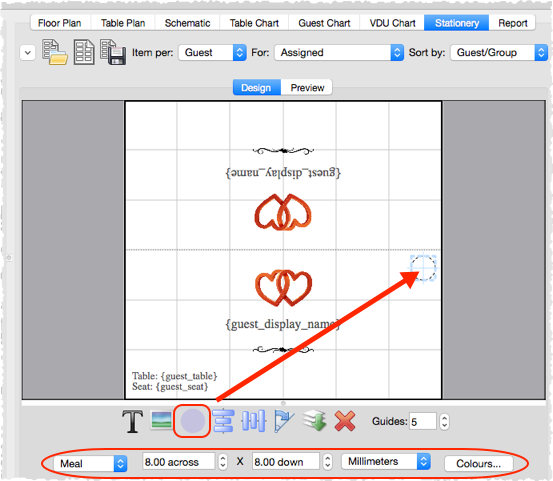
PerfectTablePlan can add coloured dots to your place cards or other stationery based on guest properties such as: gender, meal choice or custom field value. This can be useful for conveying information to serving staff.
Importing a group column
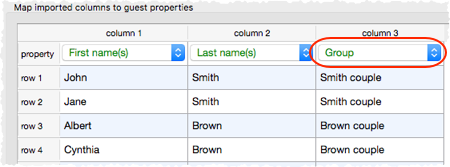
You can control how PerfectTablePlan imports guests into groups by importing a Group column.
Capitalise guest names
You can automatically capitalise guest names by checking the automatically capitalise guest names check box in the Names tab of the ![]() Preferences window. This can save time if you are entering lots of names.
Preferences window. This can save time if you are entering lots of names.
Custom titles
PerfectTablePlan is configured to recognise standard titles such as "Mr" and "Mrs". You can customize the standard titles in the Titles tab of the ![]() Preferences window. These titles will then be available in the Titles drop-down list in every plan. You can also associate a gender, age and VIP status with a title to make importing more intelligent.
Preferences window. These titles will then be available in the Titles drop-down list in every plan. You can also associate a gender, age and VIP status with a title to make importing more intelligent.
Export to PDF
Names can be hard to read from A4 or letter sized printouts. However you can export to PDF and send the PDF to someone with a larger format printer. We list a few companies that will print PDFs for you here.
Schematic pane
The ![]() Schematic pane can be a useful alternative to the
Schematic pane can be a useful alternative to the ![]() Floor plan pane when you are dragging and dropping guests. You can also drag and drop tables into a different order (e.g. to change the order they appear in the
Floor plan pane when you are dragging and dropping guests. You can also drag and drop tables into a different order (e.g. to change the order they appear in the ![]() Table chart pane).
Table chart pane).
** delimiters
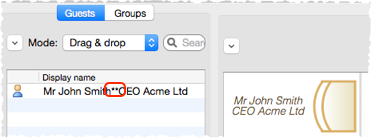
If you add ** to the Display name of a guest, the part of their name after the ** will be shown on a separate line, in italics. This can be useful for formal table plans.
Show proximity by group
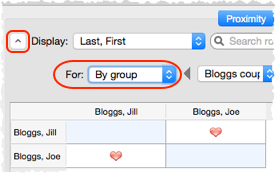
The ![]() Proximity pane can be a bit unwieldy if you have large numbers of guests. However you can view proximity one group at a time by setting the For drop-down list to By group (to show a group at a time) or By group+ (to show a group at a time, plus all the guests that members in that group have non-neutral proximity to).
Proximity pane can be a bit unwieldy if you have large numbers of guests. However you can view proximity one group at a time by setting the For drop-down list to By group (to show a group at a time) or By group+ (to show a group at a time, plus all the guests that members in that group have non-neutral proximity to).
Editing the plan file directly
PerfectTablePlan plan files are stored in text files in XML format. If you are feeling brave you can edit the file using a text editor. We recommend you make a copy first though, as PerfectTablePlan won't be able to read it back in if it is not a valid XML file.
Finding plan files
If you aren't sure where a plan file is saved, you can quickly search your harddisk for it using File>Find... in PerfectTablePlan.
Table naming
PerfectTablePlan defaults to naming tables "Table 1", "Table 2" etc. But you can change this in the New table name format field in the Naming tab of the ![]() Preferences window. Use {next_table_letter} to default to letters and {next_table_num} to default to numbers.
Preferences window. Use {next_table_letter} to default to letters and {next_table_num} to default to numbers.
Visualization colours
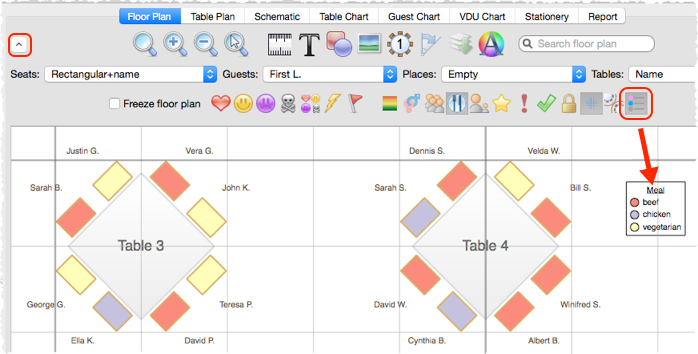
You can change the colours used to visualise meal choice, group etc.
Colour keys
You can display a colour key for visualisation colours.
Estimate numbers
You can make a simple estimate of event numbers and costs in PerfectTablePlan. Just select File>Numbers and Budget....
Apple Contacts
You can drag guests straight from Apple Contacts into the PerfectTablePlan ![]() Guests or
Guests or ![]() Groups panes.
Groups panes.
Advanced and Professional editions
Use a drawing of the venue
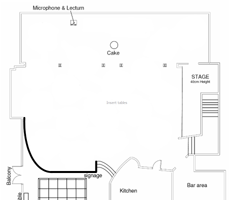
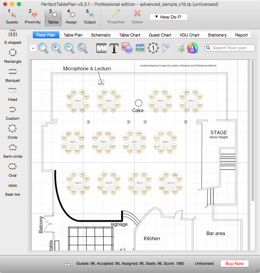
If you have a scale drawing of the venue, you can use it in your floor plan.
|
|
scaled floor plan image |
image used as floor plan background with tables added |
Add a new custom field during import
If you want to import a custom field, you don't need to add the field first. Just select <custom field> from the drop-down list in the ![]() Import data window.
Import data window.

Create a template file
If you are going to use the same floor plan and/or guest list for multiple events, you can create a template file.
Personalised seating plans
You can easily print out or export to PDF table plans that are personalised to show each guest their seat.
Custom seat numbers
You can set custom seat numbers.
Professional edition only
Auto assign multiple seatings
If you have an event with multiple seatings (e.g. consecutive nights at a business event) you can assign all the seatings in a single operation using File>Auto Assign Multiple....
Fast table renumbering/renaming
If you have a lot of tables to rename/renumber you can do it quickly using the ![]() Renumber/Rename tables window.
Renumber/Rename tables window.
Bulk edit proximity
You can change lots of proximities in one operation using the Bulk Edit Proximity window.
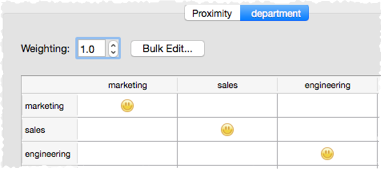
Set proximity by category
If you have categories of users you want to sit together or apart you can use custom proximity.
Create detailed reports
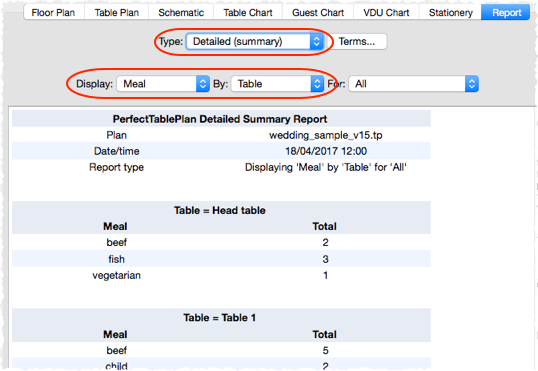
If you want to create detailed reports, e.g.: meals selected by table or the special requirements by group, you can do this using the Detailed (summary) and Detailed (guests) reports.
Print barcodes
You can print barcodes on stationery and use a barcode scanner to check-in guests. Select File>Check-In Guests... to activate check-in.
