You can check in guests by printing a barcode on their invitation, ticket or badge and then scanning this barcode into PerfectTablePlan as they arrive. This is much faster and less error prone than trying to find and update guest records by typing into PerfectTablePlan. This is a step-by-step guide to using barcodes for checking-in guests. Requirements1.A barcode scanner that emulates an extra keyboard. Usually this will plug into a USB port in your PC or Mac. You can buy them from around $90/£70/€80 and quite a few different scanners are available. For more information see our USB barcode scanners web page. Note Most USB barcode scanners do not support 2-dimensional/matrix barcodes, such as QR codes. 2.A barcode font installed on the PC or Mac you are going to use to print the barcodes. We recommend using barcodes that conform to the code 39 standard (also known as code 3/9 or code 3 of 9). Free barcode fonts are available. For more information See our barcode fonts web page. 3.A good quality printer for printing the barcodes. Ideally a laser printer. But an inkjet printer might be OK if it has a high quality setting (often called 'Photo' or 'Image' quality). 4.A unique ID for each guest comprised of only barcode compatible characters. If you let PerfectTablePlan generate your guest IDs then you shouldn't have any problems.
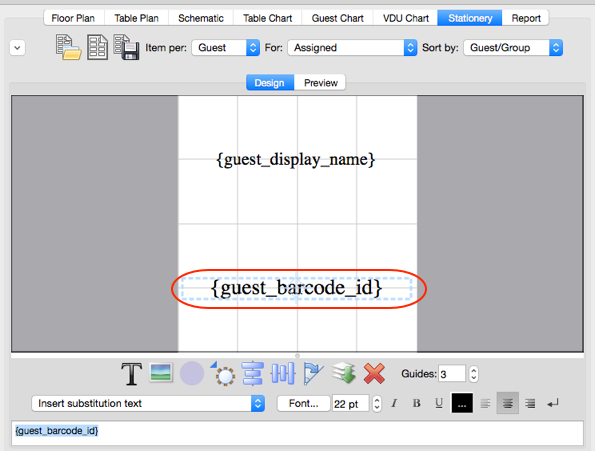
Step 1. Install a barcode font Make sure you have installed a barcode font (see above). Step 2. Add barcodes to stationeryCreate your invitations, badges or tickets as usual then add the substitution text: •{guest_barcode_id} (if you are printing a stationery item per guest); or •{group_members_barcode_ids_multi_line} (if you are printing a stationery item per group)
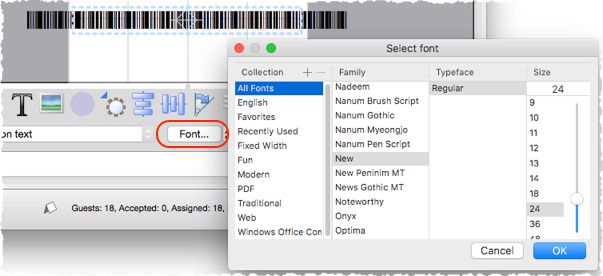
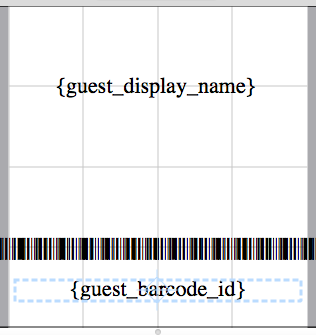
Do not select Now set the substitution text to the barcode font you have installed. Don't worry if it is very long or mostly blank at this stage in the Design tab.
It might also be a good idea to include a human-readable version of the ID under the barcode. To do this just add {guest_barcode_id} again, but choose a normal (non-barcode) font this time. Ideally use a non-proportional font, such as Courier.
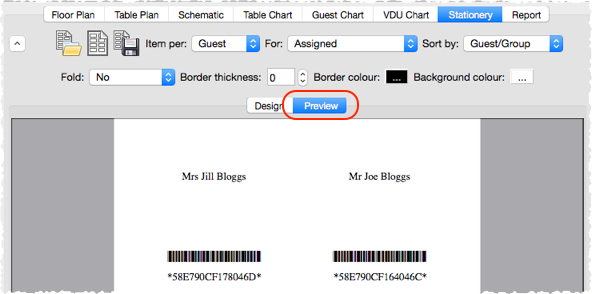
Make sure you leave some blank space around the barcode so it is easy for the scanner to read. Now check the size of the barcodes in the Preview tab.
If the barcode is too big try increasing the size of the stationery. If that isn't possible, try decreasing the barcode font size.
Step 3. Test a sample of your stationery1.Select File> 2.Click on the Setup button in the 3.In the Print setup window: •Change Pages so that only a single page is printed. •Click on Preferences and change the print quality to the highest available. •Click Print. On the PC/Mac that you intend to use for checking-in guests: 1.Plug-in your USB barcode scanner into a USB port. Note Your PC/Mac might have to install a new device driver the first time you use the scanner. 2.Start PerfectTablePlan. 3.Load your plan file. 4.Select File> If the barcode cannot be read from the printouts, try the following: •Increase the amount of white space around the barcode. •Increase or reduce the barcode font size. •Increase the quality of the printer print out. •Change the background of the stationery to white. •Change the colour of the barcode text to black. •Use higher quality stationery. •Test your barcode scanner on a barcode from another source (e.g. a tin of baked beans) to ensure that the scanner isn't defective. Note It might not be able to read some formats of barcode fonts. Step 4. Print your stationerySelect File> Test a random selection (as in step 3) to ensure you can still scan them. Step 5. Check-in your guests1.Set the
2.Select File> 3.Set the settings appropriately in the 4.Click Start checking-in>>. 5.Scan guest barcodes with your barcode scanner. |
