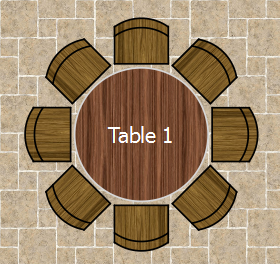
The ![]() Select Texture window allows you to use textures for tables, chairs, shapes and the background (floor) in the
Select Texture window allows you to use textures for tables, chairs, shapes and the background (floor) in the ![]() Floor Plan and
Floor Plan and ![]() Table Plan panes. Textures can be used to create a more realistic representation of features such as wooden or tiled floors.
Table Plan panes. Textures can be used to create a more realistic representation of features such as wooden or tiled floors.

To display this window either:
•Click on the ![]() Fonts and colours window with the
Fonts and colours window with the ![]() Floor Plan or
Floor Plan or ![]() Table Plan pane at the front. Then select texture from the Table, Seat or Drawing area drop-down lists.
Table Plan pane at the front. Then select texture from the Table, Seat or Drawing area drop-down lists.
•Double-click on a table in the ![]() Floor Plan and
Floor Plan and ![]() Table Plan pane and select texture from the Inside drop-down list.
Table Plan pane and select texture from the Inside drop-down list.
•Double-click on a shape in the ![]() Floor Plan pane and select texture from the Inside drop-down list.
Floor Plan pane and select texture from the Inside drop-down list.
A preview of the currently selected texture is displayed (if any). You can drag and drop a new image here, e.g. from Windows Explorer or a web browser.
If you have already added images to this plan you can select them from the Select texture drop-down list.
Click on the Browse... button to select an image file to load. PNG, JPEG and BMP image file formats are supported.
Name is the name of the original image file.
Pixels is the size of the texture image in pixels (the preview may be displayed smaller in this window).
Set the Repeat every fields to how often you want the texture to repeat, e.g. every 2.00 metres. Note that the texture preview will not change.
Set the Units drop-down list to your preferred units.
Mirror alternate tiles can be useful if you have a non-seamless texture, e.g. where the top of the texture does not matchless seamlessly with the bottom of the texture.
Click OK to accept the changes and close the window. Click Cancel to discard the changes.
The texture is stored inside your plan file, so you can move the plan file to another computer without losing your image data.
See also: