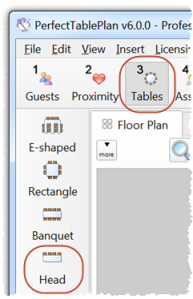
The next step is to add some tables for the guests to sit at. Click on the ![]() 3.Tables button in the Task tool bar. Click on the
3.Tables button in the Task tool bar. Click on the ![]() Insert Head Table button in the Insert tool bar.
Insert Head Table button in the Insert tool bar.
The ![]() Insert Head Table window will appear.
Insert Head Table window will appear.
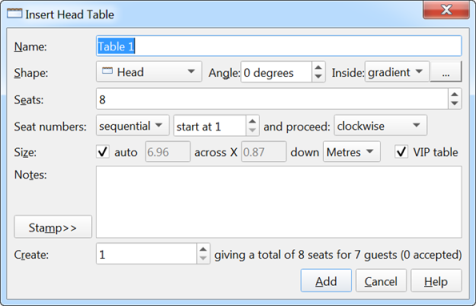
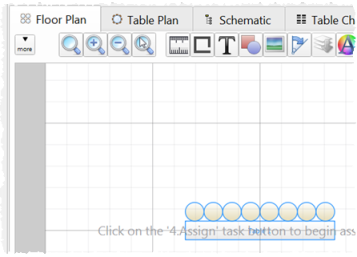
Click the Add button. A long rectangular table with 8 seats down one side will now appear near the centre of the ![]() Floor Plan pane.
Floor Plan pane.
Click on the ![]() Insert Circular Table button in the left Insert tool bar. The
Insert Circular Table button in the left Insert tool bar. The ![]() Insert Circular Table window will appear. Change Seats to 6 and Create to 2.
Insert Circular Table window will appear. Change Seats to 6 and Create to 2.
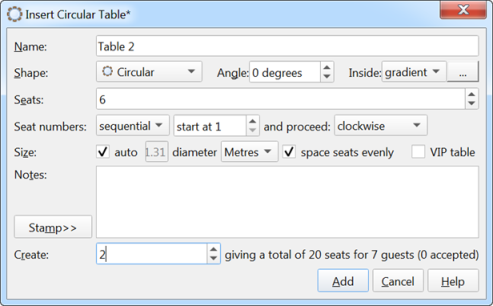
Leave the auto box checked to allow PerfectTablePlan to set a table size based on the number of seats and the Seat width set in the ![]() Dimensions window.
Dimensions window.
Next to the Create field you can see how many seats you will have after the tables have been added, in this case 20 seats.
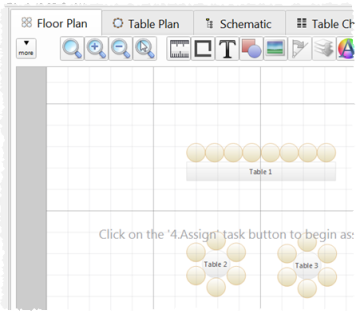
Click the Add button. Two circular tables, each with 6 seats, will now appear in the ![]() Floor Plan pane. Click the
Floor Plan pane. Click the ![]() Zoom so all tables visible button at the top of the
Zoom so all tables visible button at the top of the ![]() Floor Plan pane to centre and zoom on the tables you have added.
Floor Plan pane to centre and zoom on the tables you have added.
Drag the tables to the approximate positions shown below. Currently both tables are selected. Left-click and release on a table to select just that table. Left-click on the table again and, holding down the mouse button, drag it to the desired position and release. Repeat for the other table.
Experiment with zooming in and out using the ![]() and
and ![]() buttons and scrolling the scroll bars.
buttons and scrolling the scroll bars.
Note You can also use the mouse wheel (if you have one) for zooming or scrolling (depending on the setting in the ![]() Preferences window).
Preferences window).
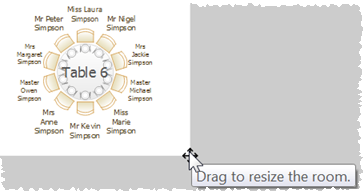
You can change the size of the floor plan using the ![]() button or by dragging the bottom-right corner of the room. This allows you to enter the dimensions of the venue in which the event will take place.
button or by dragging the bottom-right corner of the room. This allows you to enter the dimensions of the venue in which the event will take place.
You can add lines, shapes, images and text to the floor plan by clicking on the ![]() ,
, ![]() ,
, ![]() and
and ![]() buttons.
buttons.
You can rotate a table, shape or text by clicking the ![]() button. You can move a table, shape or text behind another by clicking the
button. You can move a table, shape or text behind another by clicking the ![]() button.
button.
You can change the colours and fonts in the floor plan by clicking the ![]() button at the top of the pane.
button at the top of the pane.
The Status bar now shows that you have 7 guests and 20 seats:

Click on the ![]() 1.Guests button in the Task tool bar. Add another 11 guests using the same approach as in Tutorial section 2, so that you have a total of 18 guests. Set any groups, names, genders and proximities you like.
1.Guests button in the Task tool bar. Add another 11 guests using the same approach as in Tutorial section 2, so that you have a total of 18 guests. Set any groups, names, genders and proximities you like.
Click on the ![]() 3.Tables button in the Task tool bar. You should now have 18 guests and 20 seats. Right-click on the head table in the
3.Tables button in the Task tool bar. You should now have 18 guests and 20 seats. Right-click on the head table in the ![]() Floor Plan pane and select
Floor Plan pane and select ![]() Properties.
Properties.

Change the number of seats to 6. Click the OK button.
There are now 18 seats and 18 guests.
Select File>![]() Save to save the plan.
Save to save the plan.
Note PerfectTablePlan creates a backup file every time you save the plan (unless you have disabled this in the ![]() Preferences window). This is useful if you ever need to retrieve an old version of the plan.
Preferences window). This is useful if you ever need to retrieve an old version of the plan.
Next: 5. Assign guests >>