To add an image to your stationery:
1.Ensure that the  Design tab of the
  Stationery pane is at the front.
2.Drag the image from Mac Finder or a web browser onto the Stationery plan pane.
3.Set the image across and down size.
4.Click  Rotate to rotate the image as required.
5.Click on the  Preview tab of the Stationery pane to see how the images will appear when merged.
Or:
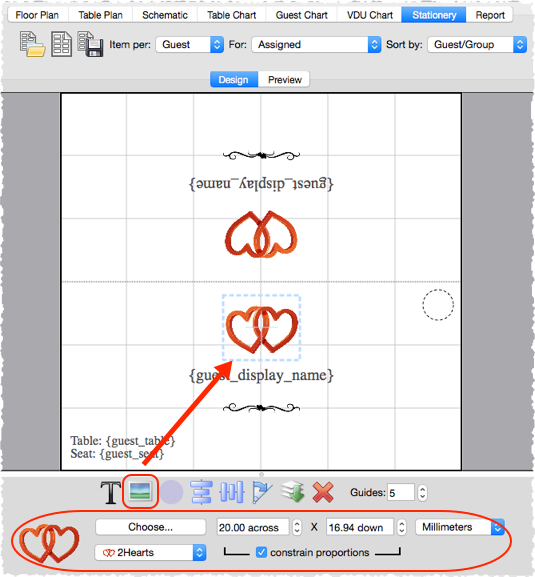
1.Ensure that the Design tab of the Stationery pane is at the front.
2.Click on the  Insert Image button at the bottom of the Stationery pane.
3.Click the cross hair cursor where you want to place the centre of the image.
4.Click on the Choose... button and select an image file (or select from the drop-down list if the image has been added previously).
5.Set the image across and down size.
6.Click Rotate to rotate the image as required.
7.Click on the Preview tab of the Stationery pane to see how the images will appear when merged.
 Video with audio (1:39 minutes)
You can use the |

See also:
•Add a personalised map to the stationery