The Insert Table window allows you to create one or more tables. To display this window select Insert>![]() Rectangular Table, Insert>
Rectangular Table, Insert>![]() Banquet Table, Insert>
Banquet Table, Insert>![]() Head Table, Insert>
Head Table, Insert>![]() Custom Table, Insert>
Custom Table, Insert>![]() Circular Table, Insert>
Circular Table, Insert>![]() Semi-Circular Table, Insert>
Semi-Circular Table, Insert>![]() Oval table, Insert>
Oval table, Insert>![]() Row Seats or the equivalent Insert tool bar button.
Row Seats or the equivalent Insert tool bar button.
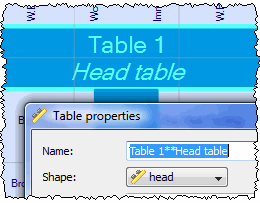
Name is the name of the table. The software will choose a unique name for you, but the names don't have to be unique and can be blank. To display the table name as 2 lines, with the second line in italics use a ** separator, for example:
Select solid or gradient and click the colour/gradient button to choose the colour/gradient of the table in the ![]() Floor Plan and
Floor Plan and ![]() Table Plan panes. This overrides any table colour set for the pane. Click Default to set the table colour back to the default.
Table Plan panes. This overrides any table colour set for the pane. Click Default to set the table colour back to the default.
Shape is the shape of the table. The available table shapes are:
Table |
Icon |
Meaning |
Rectangular |
|
a rectangular or square table with seats on four sides |
Banquet |
|
a long table with seats on two sides |
Head |
|
a long table with seats on only one side, for example a head (top) table at a wedding or banquet |
Custom |
|
a rectangular or square table with potentially different numbers of seats on each of the 4 sides |
Circular |
|
a circular table with seats all around it |
Semi-circular |
|
a semi-circular table with seats around the straight side and/or curved sides |
Oval |
|
an elliptical table with seats all around it |
Row of seats |
|
a row of seats (no table) |
Seats is the number of seats. For a circular, oval or head table or a row of seats you specify the total number of seats. For a banquet table you specify the number of seats across. For a rectangular table you specify the number of seats across and the number of seats down. For a semi-circular table you specify the number of seats across and around. For a custom table you specify the number of seats on each of the 4 sides.
Note For a square table create a rectangular table and set the number of seats across and down the same. You can specify a table with no seats for a cake, gift or serving table - it will not be shown in the ![]() Table Chart pane.
Table Chart pane.
You can change the seat numbering:
Set the Guests drop-down to Seat number at the top of the |
Size is the size of the table. Check the auto check box to automatically size the table according to the number of seats and the seat size (as set in the ![]() Dimensions window). Uncheck the auto check box to set your own table size.
Dimensions window). Uncheck the auto check box to set your own table size.
Note The automatic table size is calculated to avoid gaps and overlaps between seats, partly on aesthetic grounds. Click here to find out about 'industry standard' table sizes.
If you have a circular table bigger than the auto size you can uncheck space seats evenly to group all the seats together. This is useful for 'sweetheart' or 'cabaret' style seating.
VIP is used to designate tables for VIPs to sit at. The automatic assignment will attempt to seat VIPs on VIP tables.
Notes can be used to store any relevant notes for the table, e.g. details of table decorations. Click on Stamp >> to add a time and date stamped comment to the top of the Notes.
Create can be used to create more than one table at a time. The text alongside tells you how many seats will be available after the new tables have been created.
Click Add to accept the changes and close the window. Click Cancel to discard the changes.
Note The new table(s) will be placed automatically in the ![]() Floor Plan pane. It will attempt to place them in spaces near the centre of the room. You can then drag them to the appropriate position.
Floor Plan pane. It will attempt to place them in spaces near the centre of the room. You can then drag them to the appropriate position.
You can change any of the table properties (including the name and shape) at a later point using the Table Properties window.