Note You can also view this tutorial as a movie on our website.
The next step is to print and/or export your table plan. Click on the ![]() 5.Output button in the Task tool bar.
5.Output button in the Task tool bar.
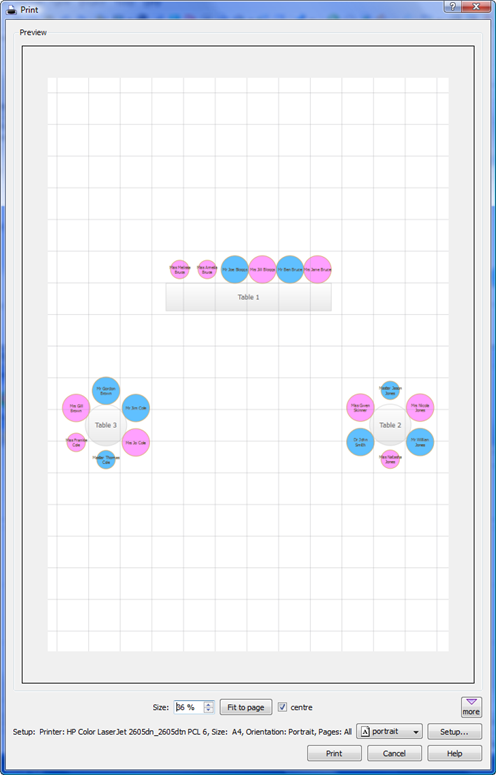
Select File>![]() Print or the equivalent Main tool bar button to print the front tab in the Top pane. The
Print or the equivalent Main tool bar button to print the front tab in the Top pane. The ![]() Print window will appear.
Print window will appear.
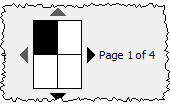
Increase the Size until the plan will be printed across 4 pages (setting it to 100% should be about right). Click on the navigation control to preview different pages.
Click on Fit to page to fit the plan on a single page.
Click on the Setup button to change printer settings, for example to select the printer (if more than one is available), paper size, print resolution etc. The controls available on the Windows will depend on the pane you are printing. Click on the Print button to print.
Print the ![]() Floor Plan pane to see the overall layout of the tables and guests.
Floor Plan pane to see the overall layout of the tables and guests.
Print the ![]() Table Plan pane for details of individual tables.
Table Plan pane for details of individual tables.
Print the ![]() Table Chart pane to see your plan ordered by table.
Table Chart pane to see your plan ordered by table.
Print the ![]() Guest Chart pane to see your plan ordered by guest or group (sorted by their last name).
Guest Chart pane to see your plan ordered by guest or group (sorted by their last name).
Print the ![]() Report pane for an overview of numbers at your event.
Report pane for an overview of numbers at your event.
Note You can also order digital prints online.
You can copy the contents of the ![]() Floor Plan,
Floor Plan, ![]() Table Plan,
Table Plan, ![]() Table Chart,
Table Chart, ![]() Guest Chart or
Guest Chart or ![]() Report panes into the clipboard using Edit>
Report panes into the clipboard using Edit>![]() Copy.
Copy.
You can also export these panes using File>![]() Export, for example to email or put on a web page. You can also use File>
Export, for example to email or put on a web page. You can also use File>![]() Export to export for use in another application, for example to create custom reports.
Export to export for use in another application, for example to create custom reports.
Next: 8. Print stationery >>