The ![]() Stationery pane allows you to design and print items of stationery and easily merge in details of your guests and their seating arrangements from your PerfectTablePlan data. Each page can contain a single stationery item (e.g. an A4 invitation letter) or multiple items (e.g. 3x6 address labels).
Stationery pane allows you to design and print items of stationery and easily merge in details of your guests and their seating arrangements from your PerfectTablePlan data. Each page can contain a single stationery item (e.g. an A4 invitation letter) or multiple items (e.g. 3x6 address labels).
Design a master for your stationery items in the ![]() Design tab and preview it in the
Design tab and preview it in the ![]() Preview tab.
Preview tab.
Note You can order place cards online.
Top controls
Click on the ![]() Open stationery button to load a stationery design. A few samples are included with PerfectTablePlan. You can also save your own designs to use later or send to other PerfectTablePlan users.
Open stationery button to load a stationery design. A few samples are included with PerfectTablePlan. You can also save your own designs to use later or send to other PerfectTablePlan users.
Click on the ![]() Stationery layout button to change the layout of the existing design. For example to change the page size or the number and dimensions of items on the page.
Stationery layout button to change the layout of the existing design. For example to change the page size or the number and dimensions of items on the page.
Click on the ![]() Save stationery button to save the current stationery design to a file. You will be able to load this design back into this plan, or another plan, at a later date.
Save stationery button to save the current stationery design to a file. You will be able to load this design back into this plan, or another plan, at a later date.
Select from the Item per drop-down list to create a stationery item for each guest, each group or each table.
Select from the For drop-down list to choose which guests/groups you wish to create stationery items for.
For example, if you are printing place cards, you probably want to select Item per to Guest and For to Assigned. If you are printing invitations you probably want to select Item per to Group and For to All. If you want to reprint an individual place card you probably want to select Item per to Guest and For to Selected....
Select from the Sort by drop-down list to determine the order in which stationery items are ordered. This feature should make it easier to set up place cards if you have hundreds of guests. It is only available for Item per=Guest .
Click on the ![]() button to show additional options.
button to show additional options.
Select from the Fold drop-down list to a horizontal or vertical fold. This can be useful for designing and printing tent fold cards. Folds are displayed in printouts.
Set the Border thickness to greater than 0 to add a border to each stationery item.
Click on the Border colour button to change the colour of the border around each item. This has no effect if the Border thickness is 0.
Click on the Background colour button to change the background colour of each item.
Design tab
Click on the ![]() Insert text button to add text and merge guest data.
Insert text button to add text and merge guest data.
Click on the ![]() Insert image button to add a graphic/image/clipart. You can also drag an image from your operating system or web browser onto the Design tab of the
Insert image button to add a graphic/image/clipart. You can also drag an image from your operating system or web browser onto the Design tab of the ![]() Stationery pane.
Stationery pane.
Click on the ![]() Colour spot button to add a colour coded spot.
Colour spot button to add a colour coded spot.
|
Click on the ![]() Horizontal centre or
Horizontal centre or ![]() Vertical centre buttons to horizontally/vertically centre the currently selected text.
Vertical centre buttons to horizontally/vertically centre the currently selected text.
Click on the ![]() Rotate button to rotate the selected text 90 degrees.
Rotate button to rotate the selected text 90 degrees.
Click on the ![]() Move to Back button to move the selected text behind any other text.
Move to Back button to move the selected text behind any other text.
To delete text click select the text and click the ![]() Delete button.
Delete button.
Change the value of Guides to the number of guidelines you wish to add to the design. These can be useful for aligning text neatly. They are not shown in printouts.
Click on the Font button to change the font of the selected text. Alternatively you can use the Font size field or the ![]() Italic,
Italic, ![]() Bold and
Bold and ![]() Underline buttons. Note PerfectTablePlan will automatically reduce the font size to try to keep it within a stationery item.
Underline buttons. Note PerfectTablePlan will automatically reduce the font size to try to keep it within a stationery item.
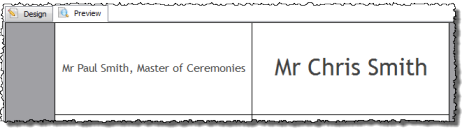
The font size has been automatically reduced to fit for the left hand stationery item
Click on the Colour button to change the colour of the selected text.
Click on the ![]() Left align,
Left align, ![]() Centre align or
Centre align or ![]() Right align buttons to change the alignment of the selected text.
Right align buttons to change the alignment of the selected text.
Click on the ![]() Word wrap button to allow line breaks to be added where text is too long to fit within the stationery. If this isn't sufficient to fit the text within the stationery, the font size may be automatically reduced as well.
Word wrap button to allow line breaks to be added where text is too long to fit within the stationery. If this isn't sufficient to fit the text within the stationery, the font size may be automatically reduced as well.
Drag the splitter at the top of the text edit box to increase or decrease the size of the text edit area.
 Preview tab
Select Display to show either a full page of items or a single item (e.g. 3x6 address labels or a single address label) and the number of the page/item to display.
Set Start position to position on the page where you wish the first item to be printed.
Check cut marks if you would like cut marks to be printed on the page. This can be useful if you are using a guillotine to cut the page.
Substitution text
If you use the following text in your design it will be substituted by the appropriate data from your plan.
In alphabetical order:
Substitution text |
Substituted by |
Example |
Available for 'Item per' |
{current_date} |
The current date in your local format |
31/12/2009 |
Guest, group or Table |
{current_time} |
The current time in 24 hour format |
13:59:00 |
Guest, group or Table |
{event_date} |
event date from |
31/1/2010 |
Guest, group or Table |
{event_name} |
event name from |
Gala dinner |
Guest, group or Table |
{event_notes} |
event notes from |
Guest, group or Table |
|
{event_venue} |
event venue from |
The Crown hotel |
Guest, group or Table |
{group_address} |
the address of the group |
1 The Street The Town Nowhereshire NW1 123 England |
Guest or Group |
{group_address1} |
line 1 of the group address |
1 The Street |
Guest or Group |
{group_address2} |
line 2 of the group address |
Guest or Group |
|
{group_country} |
the address country |
England |
Guest or Group |
{group_contact} |
full contact details of group (address + contact numbers) |
1 The Street The Town Nowhereshire NW1 123 England 111-1111-1111 email@email.com |
Guest or Group |
{group_email} |
email address |
email@email.com |
Guest or Group |
{group_home_phone} |
home phone number |
111-111-1111 |
Guest or Group |
{group_meals} |
meals of group members |
fish + beef |
Guest or Group |
{group_members_barcode_ids_multi_line} |
list of group member guest ids in a form suitable for a code 39 barcode, one per line with blank lines between (Professional Edition only) |
*1234567890* *2345678901* |
Guest or Group |
{group_members_multi_line} |
list of group members, one per line |
Mr J Smith Mrs K Smith |
Guest or Group |
{group_members} |
list of group members on one line |
Mr & Mrs J. Smith or Mr & Mrs John Smith (depending on the setting of the Display group members as field in the Names tab of the Preferences window) |
Guest or Group |
{group_mobile} |
mobile phone number |
111-111-1111 |
Guest or Group |
{group_name} |
group name |
Smith family |
Guest or Group |
{group_notes} |
notes for the group |
Guest or Group |
|
{group_num_members} |
number of members of the group |
2 |
Guest or Group |
{group_special_reqs} |
special requirements of group members |
wheelchair |
Guest or Group |
{group_state_county} |
the address state/county |
Nowhereshire |
Guest or Group |
{group_tables} |
the table(s) the group is assigned to |
table 1 |
Guest or group |
{group_table_sections} |
the table section(s) the group is assigned to - blank if not an E-shaped table (Advanced and Professional Editions only) |
A & B |
Guest or group |
{group_town_city} |
the address town/city |
The Town |
Guest or Group |
{group_work_phone} |
work phone number |
111-111-1111 |
Guest or Group |
{group_zip_postcode} |
the address zip/postcode |
NW1 123 |
Guest or Group |
{guest_age} |
guest age |
adult |
Guest |
{guest_barcode_id} |
guest id in a form suitable for a code 39 standard barcode (Professional Edition only) |
*0123456789* |
Guest |
{guest_display_name} |
guest display name |
Mr John Smith Master of Ceremonies |
Guest |
{guest_display_name**1} |
guest display name before ** |
Mr John Smith**Master of Ceremonies -> Mr John Smith |
Guest |
{guest_display_name**2} |
guest display name after ** |
Mr John Smith**Master of Ceremonies -> Master of Ceremonies |
Guest |
{guest_first_name} |
guest first name |
John |
Guest |
{guest_gender} |
guest gender |
male |
Guest |
{guest_last_name} |
guest last name |
Smith |
Guest |
{guest_meal_multi_line} |
guest meal, one course per line |
soup fish |
Guest |
{guest_meal} |
guest meal |
soup,fish |
Guest |
{guest_notes} |
notes for the guest |
Guest |
|
{guest_rsvp} |
guest RSVP status |
Accepted |
Guest |
{guest_seat} |
seat guest assigned to |
1 |
Guest |
{guest_special_req} |
guest special requirements |
visually impaired |
Guest |
{guest_suffix} |
guest suffix |
PhD |
Guest |
{guest_table_section} |
table section guest assigned to - blank if not an E-shaped table (Advanced and Professional Editions only) |
A |
Guest |
{guest_table} |
table guest assigned to |
Table 3 |
Guest |
{guest_title} |
guest title |
Mr |
Guest |
{guest_vip} |
guest VIP status |
VIP |
Guest |
{table_groups_multi_line} |
list of groups at table, one group per line |
Smith family Jones family |
Table |
{table_groups} |
list of groups at table on one line |
Smith family & Jones family |
Table |
{table_guests_multi_line} |
list of guests at table, one guest per line |
Mr J Smith Mrs K Smith |
Table |
{table_guests} |
list of guests at table on one line |
Mr & Mrs J Smith |
Table |
{table_name} |
the name of the table |
Table 1 |
Table |
{table_name**1} |
table name before ** |
Table1**HeadTable -> Table1 |
Table |
{table_name**2} |
table name after ** |
Table1**HeadTable -> Head table |
Table |
{table_notes} |
notes for the table |
Table |
|
{table_num_seats} |
number of seats for the table |
8 |
Table |
{table_shape} |
table shape |
Circular |
Table |
Note Text will only be substituted if Item per is set to the correct value, e.g. {guest_title} will not be substituted if you set Item per to Table.
Exporting
You can export your stationery to a PDF file by selecting File>![]() Export and selecting stationery to PDF file.
Export and selecting stationery to PDF file.
See also: